Development Guide
This section explains the basics for developers who wish to contribute to the TomoPy project.
Contents:
Working with GitHub
Cloning the repository
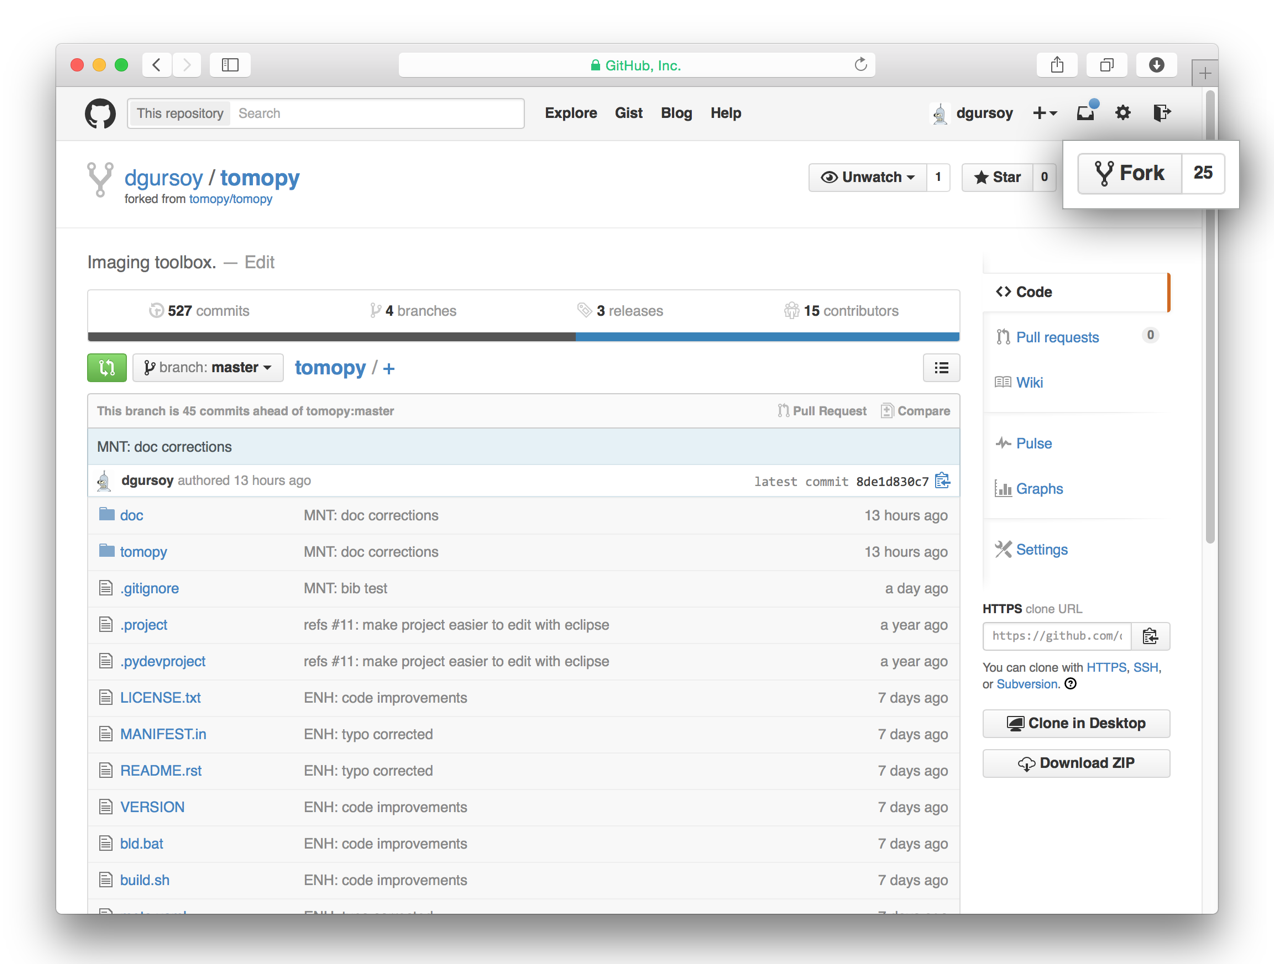
The project is maintained on GitHub, which is a version control and a collaboration platform for software developers. First register on GitHub and fork (make your own copy of) the TomoPy repository by clicking the Fork button in the header of the TomoPy repository:
This creates a remote copy of the project in your personal GitHub space. Next, clone a copy of your fork of the project to your local machine. You can do this by clicking the Clone in Desktop button in the bottom of the right hand side bar:
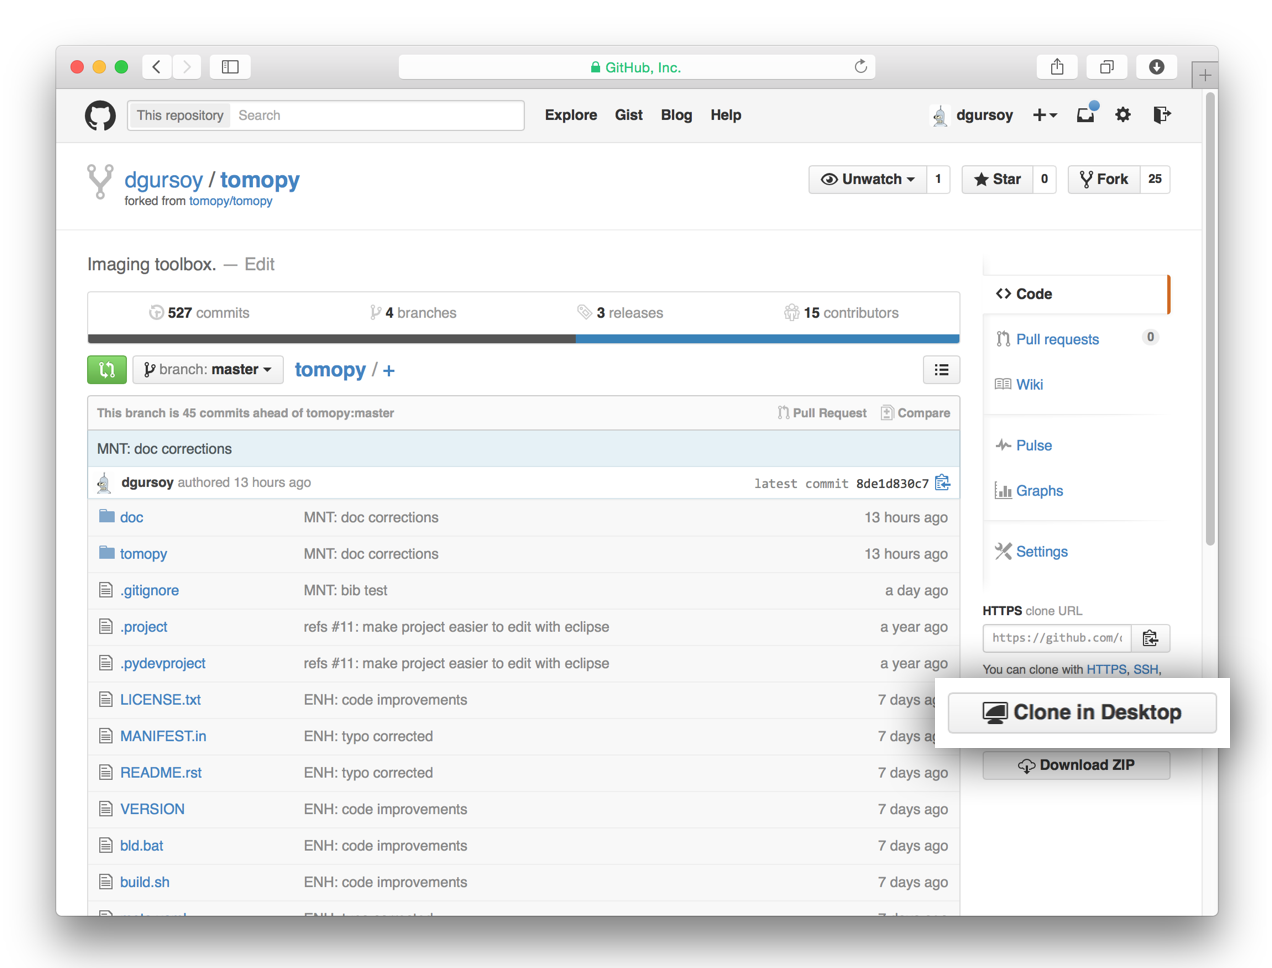
This will launch the GitHub desktop application (available for both Mac and Win) and ask you where you want to save it. Select a location in your computer and feel comfortable with making modifications in the code.
Committing changes
After making some changes in the code, take a snapshot of the edits you made. That’s when you make a commit. To do this, launch the GitHub desktop application and it should provide you all the changes in your code since your last commit. Write a brief Summary and Description about the changes you made and click the Commit button:
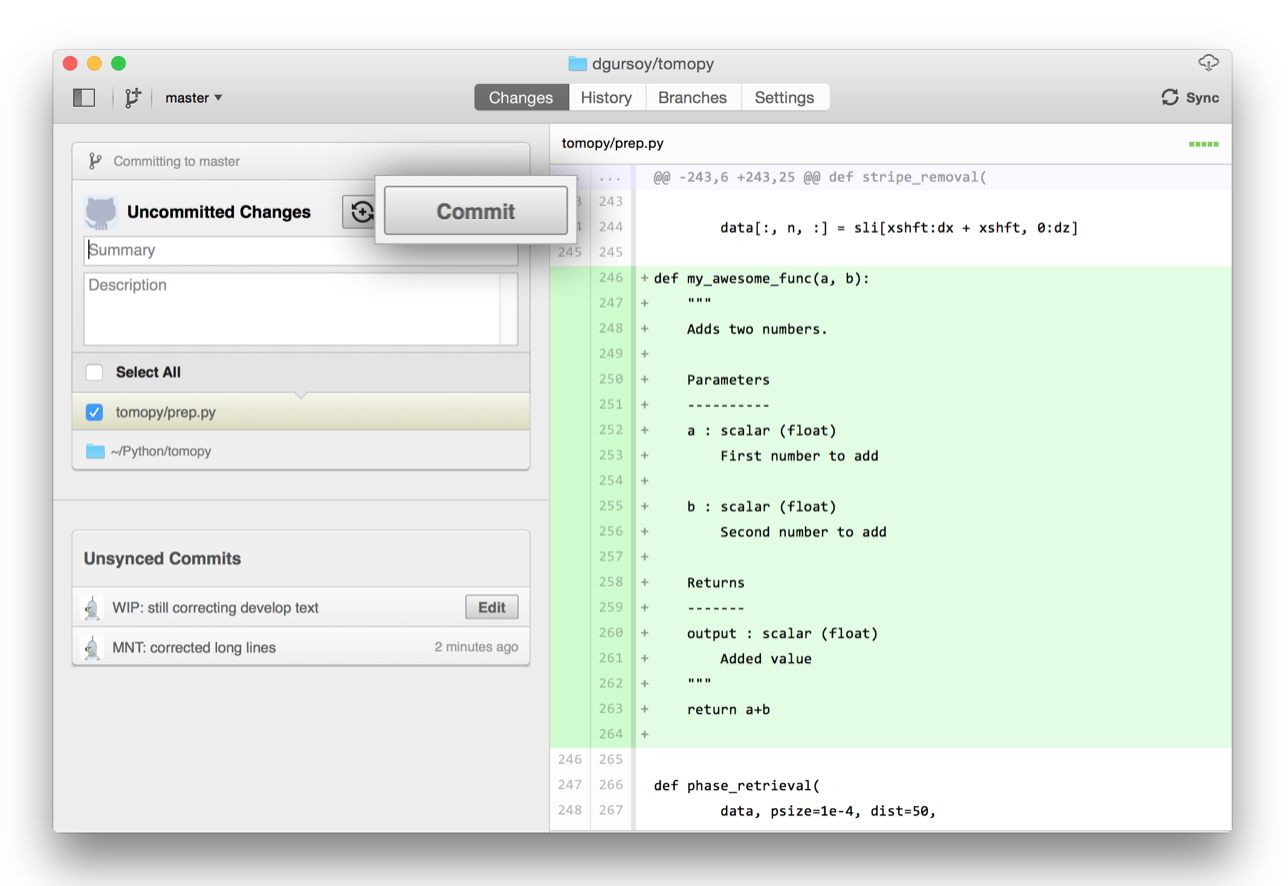
Remember that you are writing these messages to help other people understand the changes that you have made to the code.
Publishing your changes
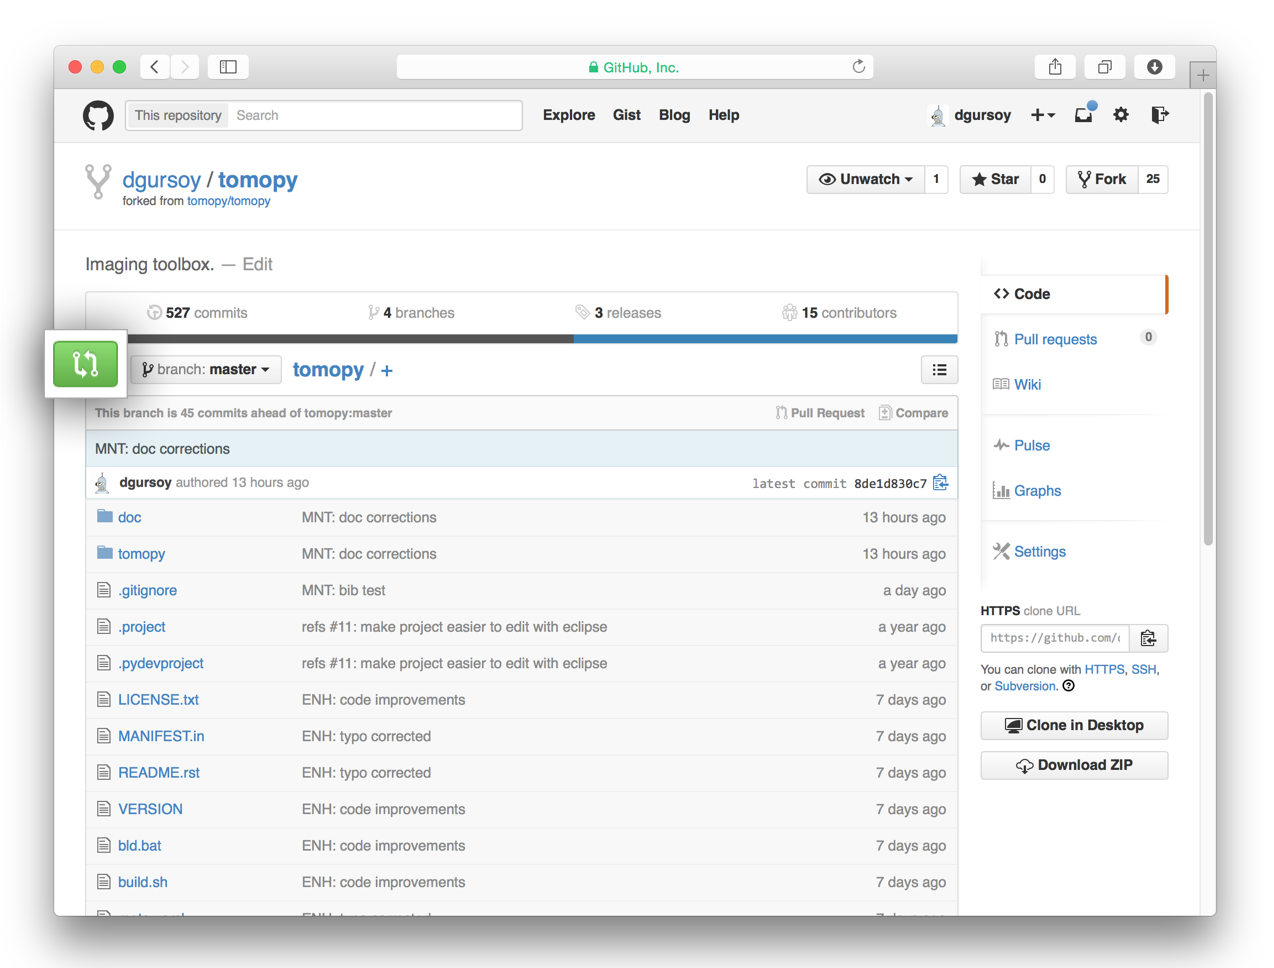
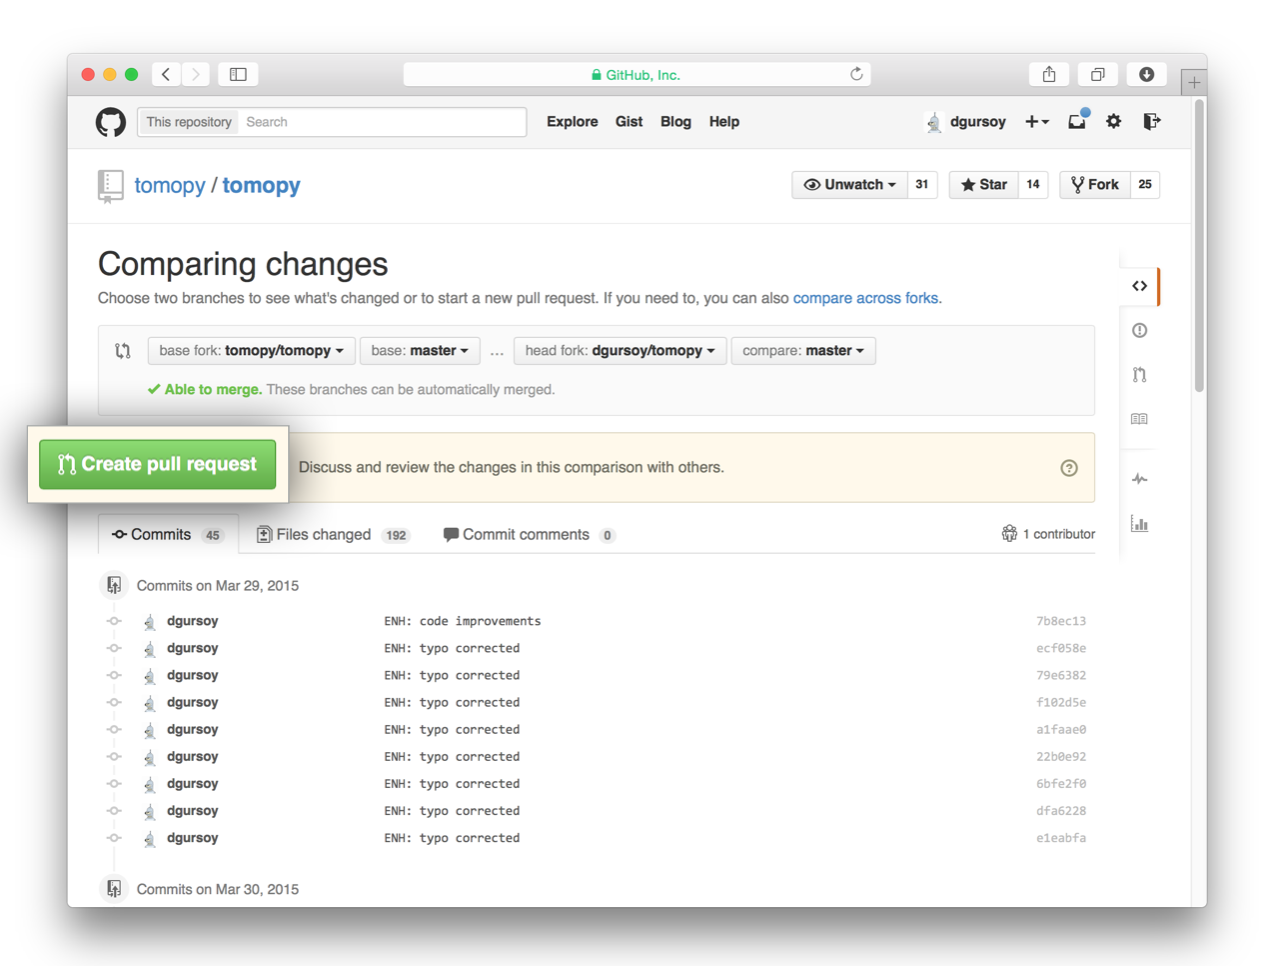
Once you feel that the functionality you added would benefit the community, then you should consider contributing back to the TomoPy project. You will need to push your local commits to GitHub, then go to your online GitHub repository of the project and click on the green button to compare, review, and create a pull request.
After clicking on this button, you are presented with a review page where you can get a high-level overview of what exactly has changed between your forked branch and the original TomoPy repository. When you’re ready to submit your pull request, click Create pull request:
Clicking on Create pull request sends you to a discussion page, where you can enter a title and helpful description. It’s important to provide as much useful information and a rationale for why you’re making this Pull Request in the first place.
When you’re ready typing out your heartfelt argument, click on Send pull request. You’re done!
Building TomoPy
Installing dependencies
To build and run TomoPy, you will need to install at least the dependencies
listed in envs/{platform}-{version}.yml plus additional dependencies based
on your platform. For convenience, installing requirements for building
the Python 3.6 version on Linux can be accomplished as follows:
$ conda env create -f envs/linux-36.yml [-n ENVIRONMENT]
This will create a new conda environment named tomopy with the build dependencies. If you already have a conda environment named tomopy. Use the -n option to name it something else.
Additional Windows Requirements
The Windows VC++2017 compiler cannot be distributed through conda. The conda package for this compiler creates link from the system provided compiler to the conda environment into which it is installed. Install VC++2017 using the Windows Build Tools installer; Visual Studio (the IDE) is not required to build TomoPy.
Additional CUDA Requirements
The CUDA compiler cannot be distributed through conda. Building TomoPy with GPU features requires the CUDA Toolkit and NVCC.
Compiling TomoPy
TomoPy is built/packaged in two parts: the python-only modules and the compiled shared libraries. The python module searches the library path at import time for the compiled shared libraries and raises an error/warning if they are not located. Because the compiled and python parts are sepeparate, developing the python parts does not require building the compiled parts; the compiled parts may be installed precompiled using conda.
TomoPy (the python-only modules)
After navigating to inside the tomopy directory, you can install TomoPy by running the install script in the typical Python way:
$ pip install . --no-deps
Running the Tests
TomoPy has a suite of Python unit tests that live in the /test directory,
where they follow the same tree structure as the packages under /tomopy.
These are automatically run by TravisCI when you make a pull request (See below
for how to do that). You can run them manually using pytest, or whichever python
test runner you prefer. To make it easier to run tests on the changes you make
to the code, it is recommended that you install TomoPy in development mode.
(python setup.py develop)
The pytest test runner, is available through pip or anaconda.
To run the tests open a terminal, navigate to your project folder, then run
py.test.
To run sections of tests, pass py.test a directory or filepath, as in py.test
test/test_recon or py.test test/test_recon/test_rotation.py.
When writing tests, at minimum we try to check all function returns with synthetic data, together with some dimension, type, etc. Writing tests is highly encouraged!
Coding conventions
We try to keep our code consistent and readable. So, please keep in mind the following style and syntax guidance before you start coding.
First of all the code should be well documented, easy to understand, and integrate well into the rest of the project. For example, when you are writing a new function always describe the purpose and the parameters:
def my_awesome_func(a, b):
    """
    Adds two numbers.

    Parameters
    ----------
    a : scalar (float)
        First number to add

    b : scalar (float)
        Second number to add

    Returns
    -------
    output : scalar (float)
        Added value
    """
    return a+b
Package versioning
We follow the X.Y.Z (Major.Minor.Patch) semantic for package versioning. The patch number is incremented for minor changes and bug fixes which do not change the software’s API. The minor version is incremented for releases which add new, but backward-compatible, API features, and the major version is incremented for API changes which are not backward-compatible. For example, software which relies on version 2.1.5 of an API is compatible with version 2.2.3, but not necessarily with 3.2.4.
We manage our versions using git tags, and the setuptools_scm package.